1. Support
Thank you so much for choosing TopPage WordPress Theme. We have put a lot of effort and love creating it. In this documentation, we have tried to consider all the important details to run your website successfully. In case you have any questions left, please feel free to submit a support ticket here.
Your feedback on our theme is much appreciated. We would love to make our product even better, so please feel free to get in touch with any suggestions for improvement. Thanks again for your support. We value you!
If you like our work, please rate it. If you are going to rate it with less than 5 stars, please let us know the reason first and we will do our best to improve the theme.

2. Theme Installation
After you’ve installed WordPress on your hosting, download the archive with the purchased theme, unzip it and prepare toppage.zip archive. Open your WordPress dashboard.
Go to Appearance > Themes and click on Add New.
Click on Choose File and select the toppage.zip. Click Install Now.
You will see the success message ‘Theme has been installed successfully’, click on the Return to Themes page. The next step is OPTIONAL and only needed if you plan to customize the theme's code. In this case, you will need to install TopPage child theme as well. The ntallation process is the same, upload and activate the toppage-child.zip.


You will see your new TopPage theme appear in the dashboard. Press the Activate button on your main theme. If you need advanced theme code customization and installed the TopPage child theme, active the child theme and do not activate the main theme. Only one theme has to be activated.

After activation you will be redirected to the ‘Welcome’ page of the theme. Now you need to install all the plugins used in the theme: click on the Install Theme Plugin button.

Select all plugins in the list, choose Select from the dropdown menu and click on the Apply button. Installation process will begin, it might take a couple of minutes, please wait until it's finished.

Once the installation process is finished, you will see a success message ‘All plugins installed and activated successfully’. Click on the Return to the Dashboard action link.
From your admin panel go to Top Page > Demo Install.
You should choose the demo you want to import and use for your theme and click on the Import button.


Demo import can take up to 10 minutes, please wait until it's finished. You will see the success message after the demo is installed successfully.

On the top bar, hover on the ‘home’ icon and select ‘Visit site’ you will see that the demo has been installed.
3. Theme Customization
In your admin panel hover on the home icon and select Visit Site.

On top on the page click on Customize and you will see Customization Panel.

In the Customization Panel you can find settings that will be applied to the entire theme.
Once you have applied any changes you have to click on the Publish button to apply those changes.

3.1 General
Go to Customize > General. Here you can upload your logo. You turn on/off a preloader for your website, show/hide a "Back to Top" button and upload a favicon for your website.

3.2 Typography
Go to Customize > Typography. In this section you can change the site's font, simply choose Google Font you wish to use from the list. If you wish to use other custom font, you will need to upload it in the Custom Fonts tab of your admin panel. After youve uploaded it, it will be added to the list in the Customize > Typography section. If you wish to use Adobe Fonts, you will need to download and istall Custom Adobe Fonts (Typekit), after you've installed the font using this plugin, it will appear in the list in Customizer.

3.3 Colors
Go to Customize > Colors. You can change main colors of the theme in this section.

3.4 Popup Settings
Go to Customize > Popup Settinga. In this section you can customize popup that can appear on CTA click. You can customize the title and body copy for the popup

3.5 Header Top
Go to Customize > Header Top. Here you can customize the top header: show or hide it, customize the copy, etc.

3.6 Header
Go to Customize > Header. In this section you can customize the header: button text and link.

3.7 Footer
Go to Customize > Footer. In this section you can customize the footer and add a copyright.

3.12 Menus
Go to Customize > Menus. In this section you can set all the menu items you want to appear in the header and footer of your theme.

3.13 Homepage Settings
Go to Customize > Homepage Settings.
In this section you can choose a page that will be displayed as a home page of your theme.

16. Homepage
To edit your homepage, in your Admin panel go to Pages, hover on the page Home and click on the Edit with Elementor acion, the page will be opened in the Elementor edit mode.

To edit the first section of the page you have to hover on it and right click on the block, select Edit Container from the dropdown. Or hover on the section and click on the middle icon on top of it:

In the left side panel you will be able to edit the background image, select Style tab and upload your image.
To edit title and subtitle on the main image, click on the Edit icon and change the text in the left side panel.

To edit the buttons, click on the Edit icon near each button and change the text and link in the left side panel. You can add a link that will be opened on click, set it up to open a popup or work as an anchor.

To edit the rating section, click on the Edit icon on the block and edit information in the left side panel:

All other sections can be edited in the same way, just hover on blocks you wish to edit, click on the Edit action and make changes in the left side panel. Don't forget to click on the Publish> to save and apply all the changes.

To edit the pricing plan section, click on the Edit action and make changes in the left side panel. You can change the number of pricing plans, all the copy and CTA link. Please not that the theme allows you to add a link to a 3rd party for the Pricing plan CTA.

The images are blurred due to the licencing rules. Please upload your own images instead of the blurred ones.
You can add an anchor to any section. The pricing plans section in the first demo has an anchor on top of the section and all the CTA will autoscroll users to this section.


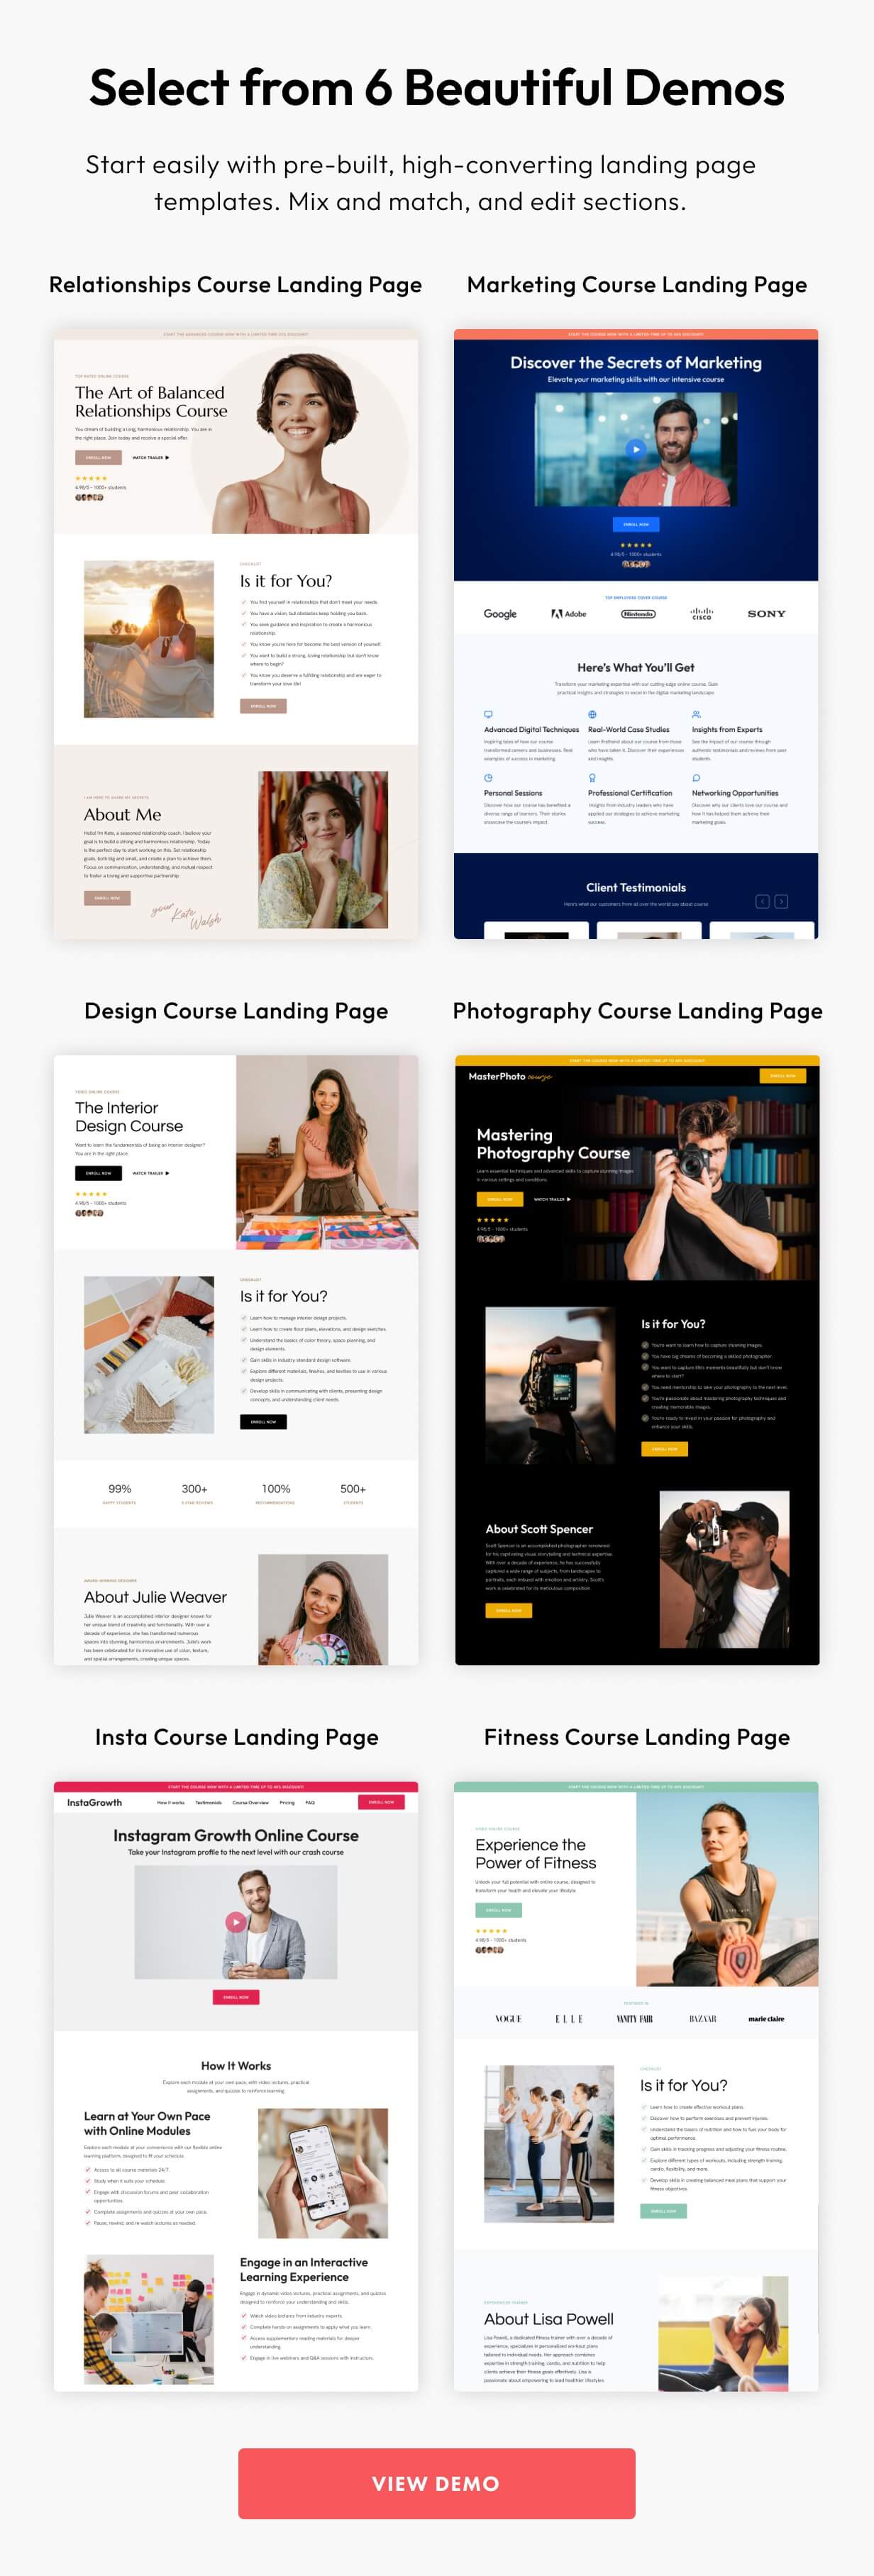
17. Templates
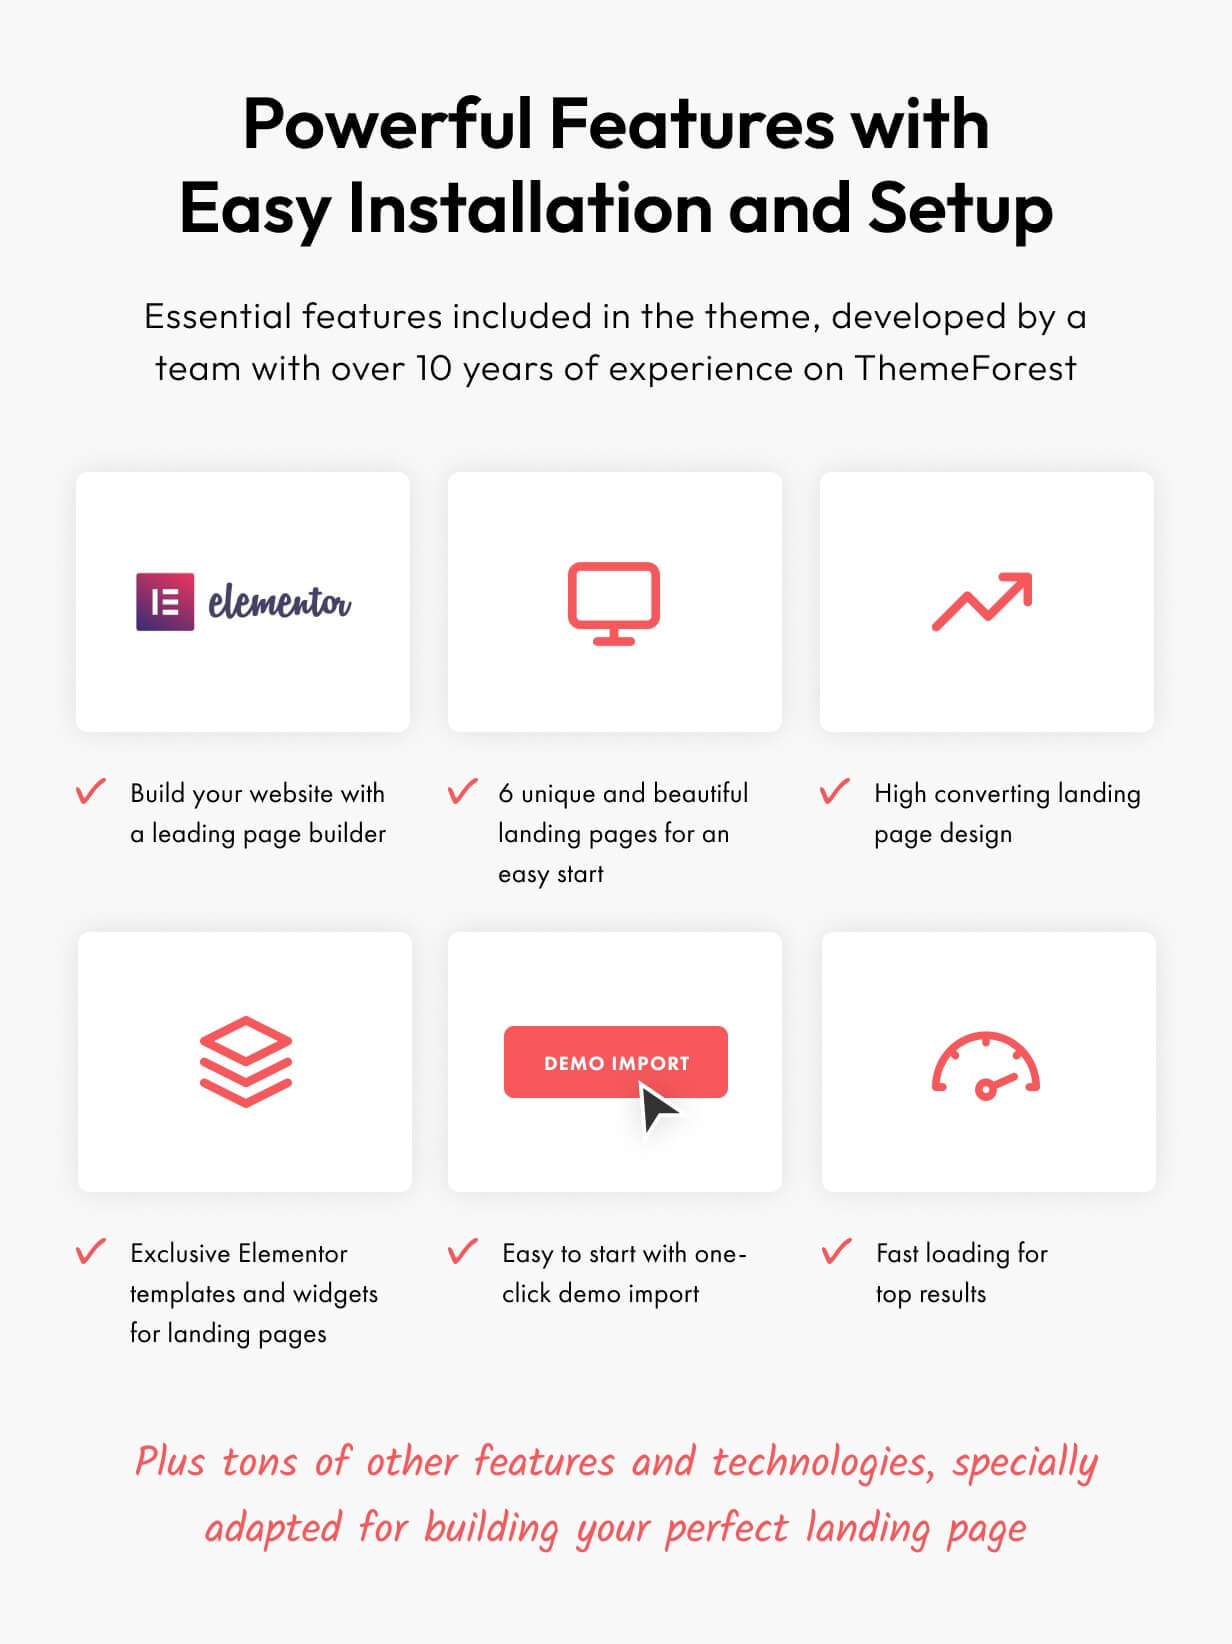
The Top Page theme comes with 6 unique landing pages. All the pages are built from beautifully designed blocks, crafted for each specific landing page theme. We created Elementor templates from all these blocks so that you can easily mix and match them to build your bespoke landing page. After you installed the demo, you will see the templates available for the landing page you installed. To see the list of the templates available for your theme, from your Admin panel go to Templates.

Another way to view and add a template to a page you are building, is to open that page with Elementor editor, scroll to the very end of the page and click on the Add temlate icon which looks like a folder.


It is also possible to upload templates from other landing pages and use theme on your page. The theme .zip file you downloaded has the folder Elementor Templates, this is the folder with all the templates from all the landing pages. You can upload them to your theme one by one or upload all of them. To upload a template, in your Admin Panel go to Templates> and click on the Import Templates and select templated you'd like to upload and use in your theme. Below are the names and screenshot of all the templates for your convenience.

Hero Section

Is it for you?

About me

Featured in

Benefits

Testimonials

Course overview

FAQ

Pricing plans

What you'll get

Contact me

How it works

Video about course

Enroll now

Try more courses

18. Multilingual Settings
19. WordPress
Since WordPress is constantly being updated information about how to install WordPress may become out of date, so you can always read the official guide here.
Here you can find some useful links about the WordPress:
WordPress Codex – general info about WordPress and how to install it on your server.
First Steps With WordPress – general information that covers a wide variety of topics.
FAQ New To WordPress – the most popular FAQ’s regarding WordPress.
20. GDPR
We suggest using Complianz – GDPR/CCPA Cookie Consent plugin. Complianz is a GDPR/CCPA Cookie Consent plugin that supports GDPR, DSGVO, CCPA and PIPEDA with a conditional Cookie Notice and customized Cookie Policy based on the results of the built-in Cookie Scan.